

Let's be honest, knowing how to clean a commercial deep fryer goes way beyond a quick wipe-down at the end of the night. It’s a full-on system: you've got the daily oil filtering, the weekly scrub-down, and the big one—a monthly boil-out to blast away all that stubborn, caked-on grease. If you're running a busy kitchen, getting this routine down is non-negotiable.
Keeping Your Las Vegas Kitchen Safe And Profitable
In the vibrant city of Las Vegas, you'll find a diverse array of restaurants that cater to every palate—from packed casino spots on the Strip to local favorites out in Henderson—and the commercial deep fryer is a workhorse, a true profit engine. But let that workhorse get dirty, and it quickly becomes a liability. We're talking about ruined food quality, wasted oil that bleeds your profits dry, and some very real safety risks. Your equipment has to perform under pressure, and a clean fryer is ground zero for that.
This isn't just another generic checklist. This is a battle-tested process built for the chaos of the Vegas food scene. We’ll walk you through exactly how to set up efficient routines for daily, weekly, and deep-clean boil-outs that actually work.
The True Cost of a Dirty Fryer
In the high-stakes game of Las Vegas restaurants, where fryers pump out mountains of fries for tourists, neglecting your deep fryer can literally slash its lifespan by up to 50%. Think about that. Proper maintenance, including those essential monthly boil-outs, can take a fryer from a 5-7 year lifespan to well over 12 years, even in the busiest kitchens. We know a bar in Henderson that cut its oil costs by a whopping 35% just by implementing a strict daily filtering routine.
A standard 40-lb commercial fryer from a brand like Atosa might be cooking hundreds of pounds of food every single day in a hotel kitchen. When you don't clean it right, grease builds up on the heating elements, forcing them to work harder and spiking your energy use by 20-30%. It’s a silent killer for your utility bills.
Before we dive into the "how," here's a quick look at what a solid cleaning schedule should look like.
Commercial Fryer Cleaning Schedule At A Glance
| Task Frequency | Essential Actions | Primary Benefit |
|---|---|---|
| Daily | Filter oil, wipe down exterior, clean baskets. | Extends oil life, improves food taste. |
| Weekly | Drain and scrub the frypot, check components. | Prevents carbon buildup, ensures even heating. |
| Monthly | Perform a full "boil-out" deep clean. | Removes stubborn grease, boosts energy efficiency. |
This schedule is your foundation for a fryer that runs smoothly and makes you money, instead of costing you.
Building a Foundation for Success
The success of any kitchen process, from prepping mise en place to the end-of-night cleanup, hinges on having clear, repeatable steps. It’s the only way to make sure every person on your team does the job safely and correctly, every single time. A documented procedure is your best friend here.
To get that consistency, you need to establish clear standard operating procedures (SOPs). You can learn more from a practical guide to mastering standard operating procedure templates to build out workflows that your crew can actually follow. This kind of structure doesn't just protect your fryer; it protects all the other essential restaurant equipment needed for success, including:
- Commercial refrigerators that keep thousands of dollars of inventory safe.
- Commercial freezers handling your long-term storage.
- Ice machines that are an absolute must in our desert climate.
A clean fryer is the heart of a profitable kitchen. It directly influences food taste, oil consumption, and even your energy bills. Investing time in proper maintenance pays dividends in customer satisfaction and operational savings.
Of course, all that used oil has to go somewhere. Properly managing your grease output is a huge part of kitchen maintenance. To make sure your plumbing can handle the load, check out our guide on https://lasvegasrestaurantequipment.com/blogs/las-vegas-restaurant-equipment/grease-trap-sizing.
Assembling Your Fryer Cleaning Toolkit

Before you even think about draining a drop of oil, you need to get your gear in order. Trying to clean a commercial deep fryer without the proper toolkit isn't just slow—it's downright dangerous. In a busy Las Vegas kitchen, where every piece of equipment is running nonstop, preparation is everything. Having your supplies ready to go protects both your crew and your equipment.
The first thing on your mind should always be safety. You're dealing with hot oil and some pretty potent cleaning chemicals, so you'll need specific Personal Protective Equipment (PPE). Don't even think about cutting corners here; a small splash can easily turn into a major injury.
Your essential safety gear should always include:
- Heat-Resistant Gloves: We're talking heavy-duty, elbow-length gloves. These are non-negotiable for protecting your hands and arms from scorching surfaces and harsh chemicals.
- Splash-Proof Goggles: Regular safety glasses won't cut it. You need fully sealed goggles to stop cleaning solutions or hot oil from getting anywhere near your eyes.
- Waterproof Apron: A heavy-duty, waterproof apron is your first line of defense, protecting your uniform and skin from chemical spills and hot water.
The Right Tools for the Job
Once you've got safety covered, it's time to gather the tools to battle that built-up grease and grime. Using the wrong brush or a standard kitchen sponge won't just make the job harder; it can actually scratch up the fryer's stainless steel surface, which can lead to rust and pitting over time.
Your cleaning caddy should be stocked with these items:
- Long-Handled Brushes: You'll need a few of these with stiff, heat-resistant bristles to scrub the inside of the fry pot without risking a burn.
- Fryer Rod or Clean-Out Tool: This is a specialized tool made specifically for clearing out hardened gunk from the drain line, which is key to preventing clogs.
- Lint-Free Cloths: Keep these on hand for the final drying step. They ensure no little fibers get left behind to contaminate your fresh oil.
- Designated Buckets: Have separate, clearly marked buckets for your cleaning solution and rinse water. This simple step is huge for preventing cross-contamination.
Choosing the Right Chemicals
The chemical you use for a boil-out is just as important as the tools you scrub with. When you're up against that tough, polymerized oil, understanding degreaser solutions is key to breaking it down effectively. But you can't just grab any degreaser off the shelf.
Never use standard dish soap or all-purpose cleaners for a boil-out. They can leave behind a soapy film that ruins the taste of your food and can even damage the fryer's heating elements over time.
Always go for a specialized, non-corrosive commercial deep fryer cleaner. These formulas are powerful enough to dissolve baked-on carbon but gentle enough that they won't harm the stainless steel. This is critical for keeping your equipment NSF-compliant.
Having a complete toolkit, including the right cleaner, empowers your team to work safely and efficiently. And if you find your current unit just isn't cutting it anymore, you can explore a wide variety of https://lasvegasrestaurantequipment.com/collections/commercial-fryers built for high-demand kitchens. This proactive approach keeps downtime to a minimum and your kitchen running like a well-oiled machine.
Daily And Weekly Fryer Maintenance Routines
In the high-stakes, fast-paced world of a Las Vegas kitchen, consistency is everything. In this vibrant city, you'll find a diverse array of restaurants that cater to every palate, and whether you're running a high-end spot in Summerlin or a local favorite in Enterprise, it's the small daily and weekly habits that make the difference between a profit-generating fryer and one that’s always on the fritz.
These simple routines aren't just suggestions; they're non-negotiable for maintaining food quality, getting the most out of your oil, and staying on the right side of Clark County health standards.
The single most important thing you can do is filter your oil every single day. As you work through a busy service, tiny bits of batter, breading, and seasoning break off and swim around in the hot oil. If you leave them overnight, they just burn, turning into carbon that wrecks your oil, makes your food taste off, and lowers the smoke point.
Think of it like trying to brew a fresh pot of coffee with yesterday's used grounds. It's never going to taste right. Filtering pulls out all that gunk, keeping your oil clean and fresh for much longer.
The Essential Daily Wind-Down
At the end of every single shift, your team needs to run through a quick reset. This isn't a full-blown deep clean, but it's crucial for stopping small messes from turning into major headaches.
- Filter the Oil: Once the oil has cooled to a safe temperature (around 150°F is a good target), run it through your filtering machine or a simple cone filter. This gets rid of the food particles that kill your oil quality.
- Wipe Down the Exterior: Grab a damp cloth and a mild degreaser and give all the stainless steel surfaces a good wipe. This stops that sticky, hazardous film of grease from building up.
- Clean the Baskets: Get a stiff-bristled brush and some hot, soapy water to scrub down the fryer baskets. You want to get all that caked-on residue off. Just make sure they're bone dry before they go back into service.
These daily steps are your first line of defense against grease buildup, which is not just a hygiene issue—it's a serious fire hazard. The same logic applies to all the stainless steel in your kitchen. For some more detailed tips, check out our guide on how to clean stainless steel grill grates.
The Weekly Deep Dive
Once a week, it’s time to go a little deeper. This weekly routine hits all the spots that a quick daily wipe-down might miss, tackling the stubborn gunk that can tank your fryer's performance. A good weekly scrub is your best weapon against the carbonization that can coat your heating elements, making them work harder and burn through more energy.
During this clean, you’ll want to meticulously scrub the fryer baskets and hangers, along with the inside walls of the fry pot above the oil line. This is where grease loves to splash and bake on, creating a tough, crusty layer that’s a nightmare to remove if you let it sit for too long.
For any operator in Las Vegas, this isn't just about being clean. It's about staying profitable and compliant. A well-cared-for fryer is a reliable workhorse; a neglected one is a constant drain on your budget and a big red flag for a health inspector.
Keeping your commercial deep fryer clean is a direct investment in your business. The numbers don't lie: dirty fryers can waste 15-25% more oil every year because of how quickly the carbon and food bits degrade it. One study showed that daily filtering in busy Las Vegas kitchens—like those in hotels or food trucks—can extend oil life from a measly 3-5 uses to as many as 10-15.
For a standard 40-lb fryer, that simple habit can slash your oil costs by $1,500-$2,000 per fryer each year.
The daily and weekly care you put into your essential restaurant equipment needed for success has a direct impact on your bottom line. Proper maintenance of items like commercial refrigerators, commercial freezers, and ice machines, alongside your fryers, ensures the quality of every single plate that leaves your kitchen.
How To Perform a Monthly Boil Out Deep Clean
The monthly boil-out is your secret weapon against the gunk that builds up in a busy kitchen fryer. This is where you really get in there and tackle the tough, baked-on carbon and polymerized grease that daily wipe-downs just can’t handle. Honestly, getting this process down is what keeps your fryer running efficiently, makes your food taste clean and fresh, and extends the life of your equipment for years to come.
Think of it as a hard reset for your fryer. Over time, that old oil residue cooks onto the fry pot walls, basically acting like insulation. Your heating elements have to work way harder, burning through more energy just to hold the right temp. A good boil-out strips all that away, getting the metal back to how it should be.
Preparing for a Safe Boil Out
First things first: safety. You’re dealing with hot water and cleaning chemicals, so having the right gear and a clear workspace is non-negotiable. Grab everything from your cleaning toolkit, and make sure you’ve got your PPE on—especially those heat-resistant gloves and splash-proof goggles.
The fryer has to be completely off, and the oil needs to cool down to a safe temperature, usually somewhere below 150°F. You never want to attempt a boil-out with hot oil; it's a surefire way to get a nasty burn. Once it’s cool, drain the old oil into a designated, heat-proof container for disposal. This isn't just about cleaning—it's about starting fresh, which is critical for any kitchen that takes pride in its food.
Executing the Boil Out Procedure
With the old oil gone, it's time to get down to business. Fill the empty fry pot with cold water right up to the oil fill line. Then, add your commercial fryer cleaner, making sure to follow the manufacturer’s ratio. Using the right amount is key—too little won't cut it, and too much can be a real pain to rinse out completely.
Now, turn the fryer on and set it to a low simmer, right around 200°F (93°C). Just let the solution do its thing, gently boiling for about 20-30 minutes. That slow simmer is what activates the cleaner, letting it break down all that caked-on grease without you having to scrub like crazy. You want to avoid a hard, rolling boil, which can splash and create a real mess (and a safety hazard). A lot of the newer fryers you see in Las Vegas kitchens even have a dedicated "boil-out" mode that handles this for you.
This monthly routine is a huge deal, especially in a town with such high standards for food quality. I remember back in 2019, a Henderson casino had an outbreak that sickened 150 people, and it was traced back to fryer gunk. It really drives home the point that according to CDC data updated through 2025, a staggering 35% of foodborne illnesses in commercial kitchens can be linked to uncleaned deep fryers. If you want to dive deeper, you can learn more about proper equipment care from the pros at Las Vegas Restaurant Equipment.
A boil-out isn't a standalone task; it's a core part of a bigger maintenance plan. This graphic shows you exactly how it all fits together.
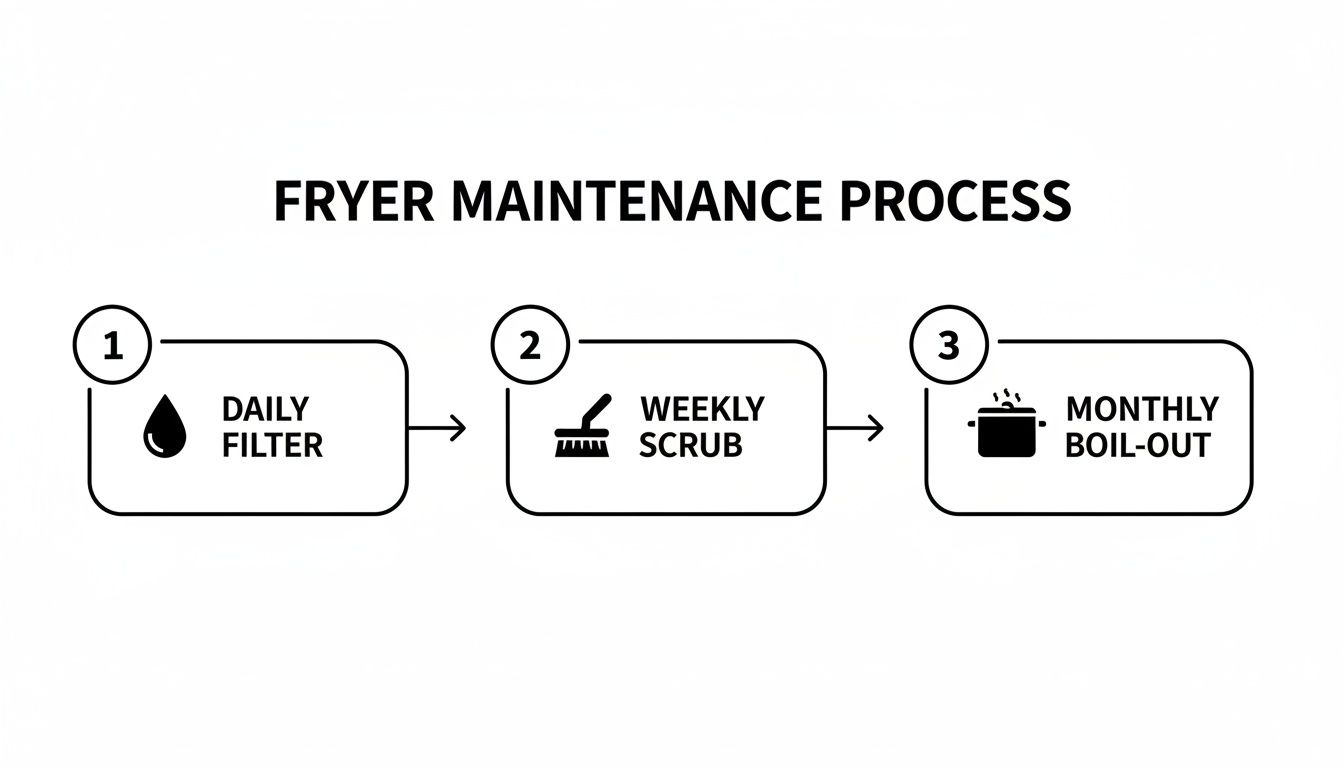
As you can see, the daily filtering, weekly scrubbing, and monthly boil-out all work together. Each step builds on the last to keep your gear in top shape and your food safe.
Before starting the boil-out, it’s a good idea to run through a quick safety check. This simple table breaks down what you need to do and why it's so important at each stage.
Boil-Out Procedure Safety Checklist
| Phase | Action Required | Critical Safety Precaution |
|---|---|---|
| Preparation | Turn off and unplug the fryer. | Prevents accidental activation and electrical shock. |
| Preparation | Allow oil to cool completely (below 150°F). | Avoids severe burns from splashing hot oil. |
| Preparation | Wear PPE (heat-resistant gloves, goggles). | Protects skin and eyes from chemicals and hot water. |
| Cleaning | Fill with water before adding chemicals. | Prevents chemical splashing when adding the solution. |
| Cleaning | Maintain a gentle simmer, not a rolling boil. | Minimizes the risk of hazardous boil-overs and splashes. |
| Rinsing | Let the cleaning solution cool before draining. | Reduces the risk of steam burns and splashing. |
| Final Steps | Ensure the fry pot is 100% dry before adding new oil. | Prevents dangerous steam explosions when oil is heated. |
Following these steps isn't just about procedure; it's about creating a safe work environment for your whole team.
Rinsing and Neutralizing
Once the boil-out cycle is done, turn off the fryer and let the solution cool down before you drain it. Now for a step that a lot of people skip but is absolutely essential: neutralizing the cleaner. Any chemical residue left in that pot will ruin the taste of your fresh oil and, by extension, your food.
Here's how to do it right:
- Refill the fry pot with clean, warm water.
- Add a bit of white vinegar or a special neutralizing solution. A good rule of thumb is about one cup of vinegar for every gallon of water.
- Let that solution sit in the fryer for about 10 minutes to kill off any remaining alkaline cleaner.
After that, drain the vinegar mix and give it one last rinse with plain, clean water to get rid of any vinegar smell. This double-rinse method is your best bet against any weird aftertastes.
Finally, you have to get the fryer completely dry. Use clean, lint-free towels and wipe down every single surface inside, especially around the heating elements. Any leftover moisture can cause a steam explosion when you pour in new oil, not to mention potential electrical problems. To be safe, let it air-dry for at least 30-60 minutes before putting it all back together. In the Las Vegas food scene, where every detail matters, this is the kind of meticulous cleaning for all your gear—from your commercial freezers to your ice machines—that separates the pros from the amateurs.
Solving Common Fryer Cleaning Problems

Even if you have a perfect cleaning routine, every Las Vegas kitchen manager knows that fryers can be… particular. In the vibrant city of Las Vegas, where you'll find a diverse array of restaurants that cater to every palate, things go wrong. Whether you're running a 24/7 kitchen on the Strip or a packed food truck, knowing how to troubleshoot common cleaning issues on the fly is what keeps the kitchen humming and your fried chicken tasting legendary.
Most of these problems are pretty simple to fix. But if you ignore them, you’re looking at bigger headaches down the road that can mess with everything from food quality to the lifespan of your equipment. Let’s jump in and tackle some of the most common challenges you’ll run into.
Tackling Stubborn Carbon Buildup
We’ve all been there. You find those stubborn carbon spots that just laugh at your regular scrubbing. These baked-on patches are a real pain, especially in older fryers or if a unit has gone too long between boil-outs.
Don't just scrub harder—you'll risk damaging the stainless steel. The trick is to switch up your approach. Instead of a diluted solution, mix your powdered fryer cleaner with just enough hot water to form a thick paste. Slather that paste directly onto the carbon spots and let it work its magic for 15-20 minutes before starting the boil-out. This gives the cleaner concentrated power to break down that polymerized grease, so it lifts right off with minimal effort.
Eliminating That Chemical Aftertaste
There's nothing more frustrating than doing a full boil-out only to have the first few batches of fries come out with a faint chemical taste. That’s the classic sign of cleaning solution that wasn't fully rinsed and neutralized. It’s an easy mistake to make, but one that can ruin a customer's meal.
The fix is non-negotiable. After your main rinse, you have to do a neutralizing rinse. Fill the fry pot with a mix of 10 parts water to 1 part white vinegar. Let that sit for about 10 minutes, drain it, and then give it one last rinse with plain water. This final step guarantees every bit of the alkaline cleaner is gone, protecting your oil's flavor.
A proper neutralizing rinse is the final seal on a good cleaning job. Skipping it is like washing a car and leaving soap spots all over the paint—it undermines all your hard work.
Resolving Slow Heating After Cleaning
So, you’ve just wrapped up a deep clean, filled the fryer with fresh, expensive oil, and now it's taking forever to get up to temp. This is an incredibly common problem, and it almost always points to one of two culprits: moisture or a poorly seated heating element.
Water is the mortal enemy of hot oil. Even a tiny amount left in the fry pot will cause dangerous splattering and seriously slow down the heating process. After that final rinse, you need to be meticulous. Dry the entire interior with lint-free cloths. Then, let the unit air-dry for at least 30 minutes. If you have an electric model, double-check that the heating elements are completely dry and snapped securely back into place. A loose connection won't let the element draw its full power.
This kind of attention to detail is just as crucial for your other workhorse equipment, like commercial refrigerators and ice machines, where moisture can also lead to major performance dips.
Smart Cleaning for Small Spaces
The Las Vegas food scene is incredibly diverse, and not every kitchen is a massive, sprawling operation. Food trucks and cozier restaurants face their own unique cleaning challenges, especially with oil disposal.
When space is tight, efficiency is everything.
- Portable Filtering: Instead of a big integrated system, look into a smaller, portable oil filtration machine. It’s a space-saver and makes the daily filtering routine much more manageable.
- Scheduled Disposal: Find a local Las Vegas oil recycling service that works with smaller volumes. They can set you up with smaller, sealed containers that are way easier to store and handle.
- Component Cleaning: Use a dedicated three-compartment sink just for cleaning baskets and other removable parts. This creates a clear, safe workflow that won’t get in the way of food prep.
By adapting your process to your space, you can keep the same high standards for your how to clean commercial deep fryer routine, no matter the size of your kitchen.
Have Questions? We Have Answers.
Let's tackle some of the most common questions we hear from restaurant operators in and around Las Vegas about keeping their fryers in prime condition.
How Often Should I Change Fryer Oil In A High-Volume Vegas Restaurant?
There’s no one-size-fits-all answer here. The right frequency really hinges on what you're cooking and how much of it you're pushing out. A slammed casino spot on the Strip that's constantly frying heavily breaded chicken might need to swap its oil every day or two. On the other hand, a more laid-back cafe in Summerlin could probably stretch that to five or even seven days.
The best way to know for sure? Stop guessing and start testing. Get some oil testing strips and make it a daily habit. Your eyes and nose are also great tools. You're looking for the tell-tale signs that the oil has given up:
- Smoking: If your oil is smoking at lower temps than it used to, it's breaking down.
- Dark Color: Good oil has a nice golden hue. Old, spent oil turns dark and murky.
- Bad Smell: You know the smell. If it's got that sharp, rancid odor, it's done.
- Soggy Food: When your fried chicken comes out greasy instead of crispy, your oil is the culprit.
And here's the real pro-tip: daily filtering is absolutely non-negotiable. It's a simple step, but it can easily double the life of your oil by pulling out all those little bits of food that cause it to break down faster. In a busy Vegas kitchen, that discipline translates into some serious savings on oil costs over the year.
Can I Use A Regular Degreaser For The Boil Out?
This one is a hard no. Using standard soaps or an all-purpose degreaser for a boil-out is a rookie mistake that can create some serious headaches for your kitchen.
First off, those cleaners often leave behind a chemical residue that is not food-safe. That residue will contaminate your fresh oil and make your food taste soapy and just plain wrong. Even worse, many of these general-purpose cleaners are corrosive and can eat away at the stainless steel of your fry pot over time. That kind of damage isn't just ugly; it can void your equipment's warranty.
Always, always use a dedicated, professional-grade fryer cleaning powder or liquid. These cleaners are made specifically to annihilate that tough, baked-on grease without damaging the fryer or leaving behind any nasty, unsafe residue.
Think of it this way: you wouldn't use floor cleaner to wipe down your commercial refrigerators or commercial freezers, would you? Same principle applies here. Use the right tool for the job.
What Is The Safest Way To Dispose Of Used Cooking Oil In Nevada?
Proper oil disposal isn't just good kitchen practice—it's the law. Pouring used cooking oil down a drain is a surefire way to cause massive plumbing clogs and get hit with some pretty hefty fines. It's also terrible for our desert environment.
For any professional kitchen in Las Vegas or Henderson, the standard operating procedure is to work with a licensed used cooking oil collection service. These are the pros who handle this kind of waste correctly.
Here’s a quick rundown of how it usually works:
- Get a Bin: The service will drop off a secure, sealed collection bin, which you'll typically keep outside near your dumpsters.
- Cool It Down: After you're done with the oil, let it cool down completely. This is a critical safety step.
- Transfer and Wait: Carefully transfer the cooled oil into the collection bin. The company will then swing by on a regular schedule to pick up the full bin and leave you with a fresh, empty one.
It’s the most compliant and hassle-free way to handle it. If you're running a smaller operation like a food truck, you might need to haul the cooled, sealed oil to a designated disposal site yourself, but for most restaurants, a collection service is the way to go.
Why Is My Fryer Heating Slowly After A Boil Out?
If your fryer feels like it's taking forever to get up to temp after a deep clean, the number one suspect is almost always leftover moisture. If the fry pot—and especially the heating elements on an electric model—aren't 100% dry before you add fresh oil, you're going to have problems.
We all know water and hot oil make for a dangerous, spattering mess that can cause serious burns. But beyond that safety risk, any water left on electrical components can cause them to short out or malfunction, leading to sluggish and uneven heating. It’s a similar issue to what can happen with other equipment, like your ice machines, where moisture in the wrong spot can kill performance.
Once you’ve done that final neutralizing rinse, you have to be obsessive about drying.
- Get in there with clean, lint-free towels and wipe down every single surface inside the pot.
- Pay close attention to the heating elements and any little corners or crevices where water loves to hide.
- Let the fryer air-dry for a good 30 to 60 minutes before putting it back together and adding oil. That last bit of patience is your best defense against slow heat-up times and potential damage.
Keeping your kitchen's workhorses in peak condition is non-negotiable in the competitive Las Vegas food scene. For reliable, warranty-backed commercial fryers, refrigerators, and more, trust Las Vegas Restaurant Equipment to outfit your operation for performance and longevity. Explore our full catalog at https://lasvegasrestaurantequipment.com.